I recently completed a project that took original vector art made in Adobe illustrator and turned it into MIDI notes to generate music. When I began the project I knew that there were a lot of ways to go about this, but I don't know a ton of programming, so I wanted to keep it as simple as possible, without learning a whole new framework.
One approach I ran across is the no-prize solution of printing your drawing out on a transparency and tracing it into a MIDI grid as demonstrated by this brilliant composition based on a drawing of a unicorn. But SVG's exist as a series of data points, right? So there must be a way to translate those points into MIDI signals... The following is my method, there are probably ways to improve this workflow, but I figured this might help someone else or at least provide some new tools to anyone interested in data processing.
Step 1. Make some vector art

I used Adobe Illustrator, but anything that can export an SVG file should work. You can open an SVG with a text editor to view the code. This method only works with the types of "roller-coaster" line drawings seen in my Story Scores project. For example a straight line might only generate a single datapoint (e.g. "make a line at these coordinates and it goes straight for 200px"). I also ran into trouble trying to apply this method to closed polygons, because the resulting MIDI notes would trace the circumference of the shape in a linear progression over time. Instead of drawing a full circle in the MIDI grid, I got an unwrapped circle that looked more like a parabola.
Turn off the strokes for your artwork (I duplicated my artboard to keep the original version in tact).
Switch on Outline mode (⌘+Y) to see the raw paths, and drag each segment of your drawing into the Quick Export window. For my project, I wanted a different line for each character in a movie, and for the final audio composition, they'll be represented by a different instrument, so I exported each character's line as a unique SVG.
Step 2. Convert SVG to text coordinates
SVG's are commonly converted to text for use in web development and the like, but the code isn't quite what we need for this sonification experiment. Open an SVG in a text editor and copy the entire code.
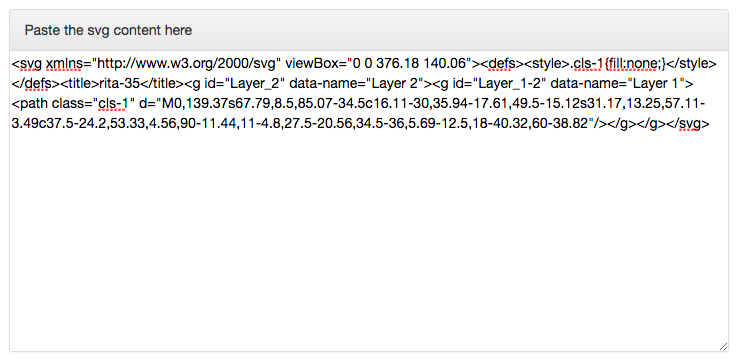
Paste the code into this online SVG-to-WKT converter by David McClure. This extrapolates the SVG data onto a two-dimensional grid, giving you XY coordinates in what's called "Well-known text." Handy.
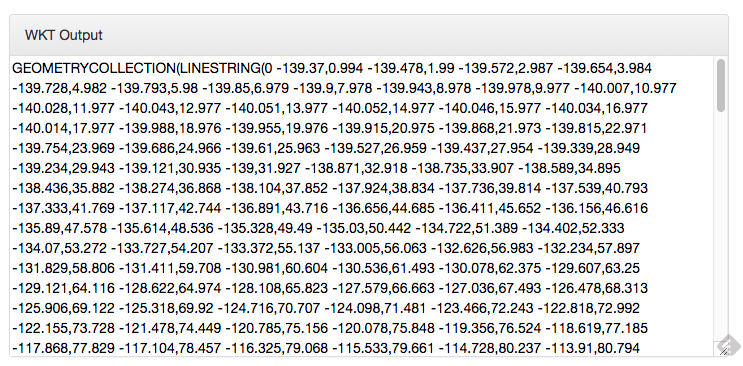
Delete the opening and closing parentheses and the "GEOMETRY" text at the beginning, so that all you're left with is the coordinates. Copy all the coordinates....
...and paste them into this online tool from Text Mechanic to remove line breaks after every comma.
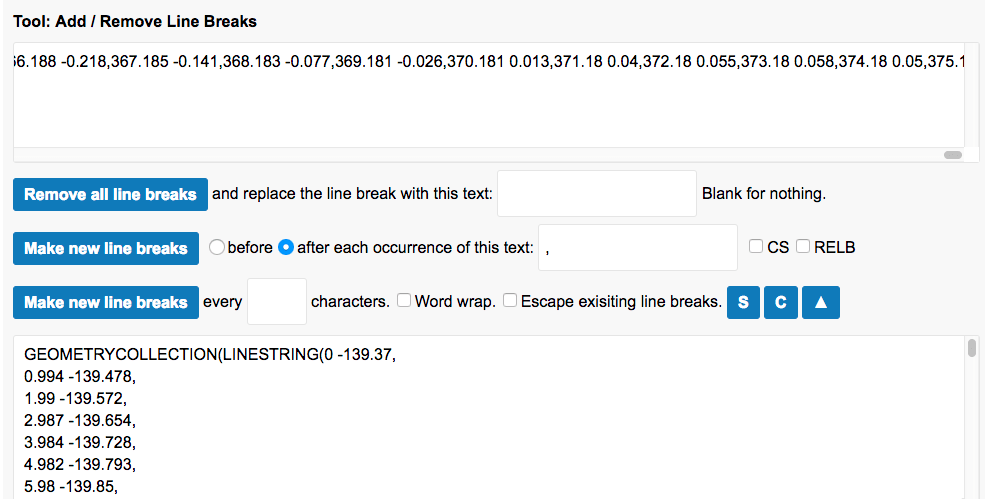
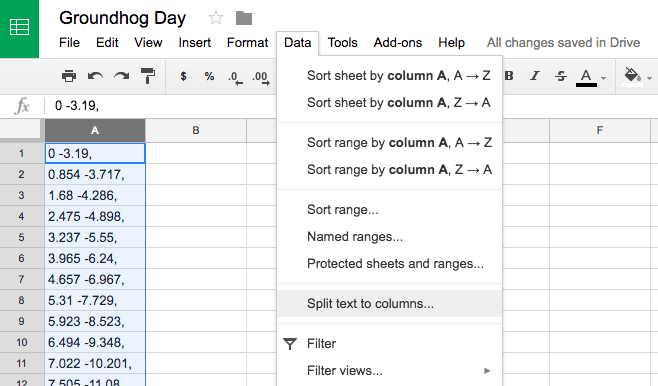
Copy and paste the list of coordinates into a spreadsheet app. I used Google Sheets. Split the list of coordinates into two separate columns using "Data" >>> "Split text into columns" and set the separator to comma. The first column is just a linear progression from left to right; we're interested in the second column—the Y values. You may be able to just use that second column for the rest of the process, but I found that most of my datasets included too many coordinates. So here's a quick way to remove some of those numbers and retain the essential shape of your drawing.
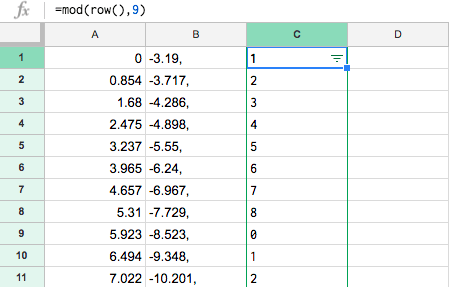
- In a new column, enter "=mod(row(),2)" (without the quotation marks).
- Drag that value down to paste it into the following cells, for the full length of your dataset.
- Scroll up to the top, and select the entire column.
- Select Data >>> Filter and uncheck the cells with a value of "1" or "blank" so only the "2" cells remain.
This is a non-destructive way to cut your dataset in half (you can re-activate the "1" cells if desired. You can also enter another value in the initial equation to reduce the number of cells further — e.g. =mod(row(),8)
Copy the second column of coordinates (Y values) and paste into TextWrangler (or similar rich text editor).
Use "Replace all" to replace all the commas with semi-colons, and remove all the hyphens (-). We don't want any negative numbers. Save each list of coordinates as a separate text file.
Step 3. Convert text coordinates into MIDI
I'm sure there are other options for this, but I've used Pure Data in the past, and it's open source, so it's free to use. Pure Data (install PD-Extended) is kind of tricky to lean, because there's no real GUI and it's totally open-ended. If you want to learn more about PD, I recommend PD Tutorial—but you can also just download my patch and run it without too much trouble.
You'll need to turn on your computer's virtual MIDI Bus to allow PD to send MIDI signals to Ableton (or other DAW) as if it was an external MIDI controller. Here's some instructions for doing this in OSX, where it's called the "IAC Driver" — and if you're on Windows, just do some Googling ¯\_(ツ)_/¯
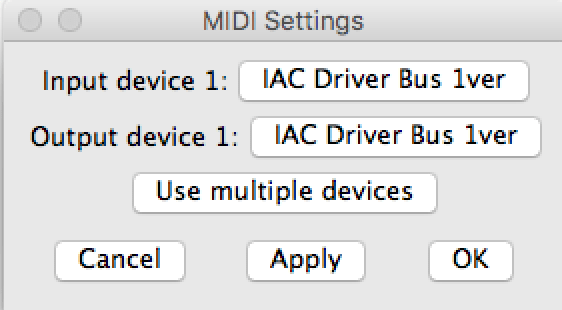
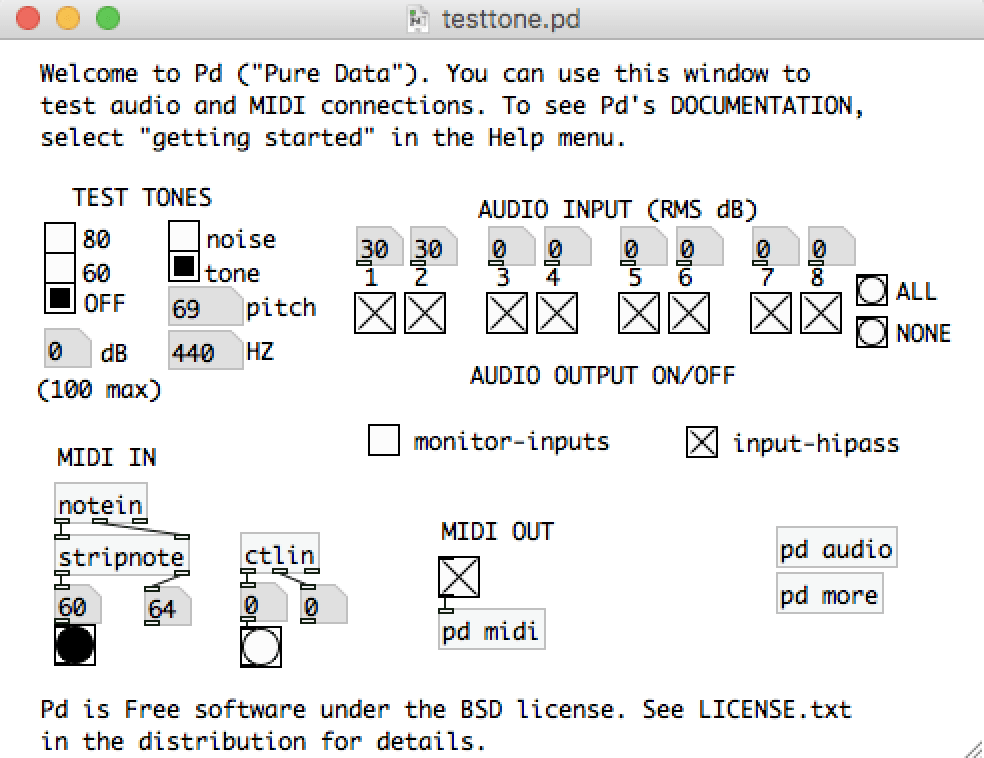
Once you've activated a virtual MIDI Bus, make sure PD is set to use it (Media >>> MIDI Settings), and Ableton is set to receive it (Preferences >>> MIDI). You can test the connection by opening up PD's "Test Audio & MIDI" window under "Media."
Place the PD file in the same folder as your text files (the patch will look for text files in the same root folder that its located in).
In the PD patch, change the name of the file referenced in the "read" object to match one of your files. In order to change text, you'll need to enter Edit Mode (⌘+E).
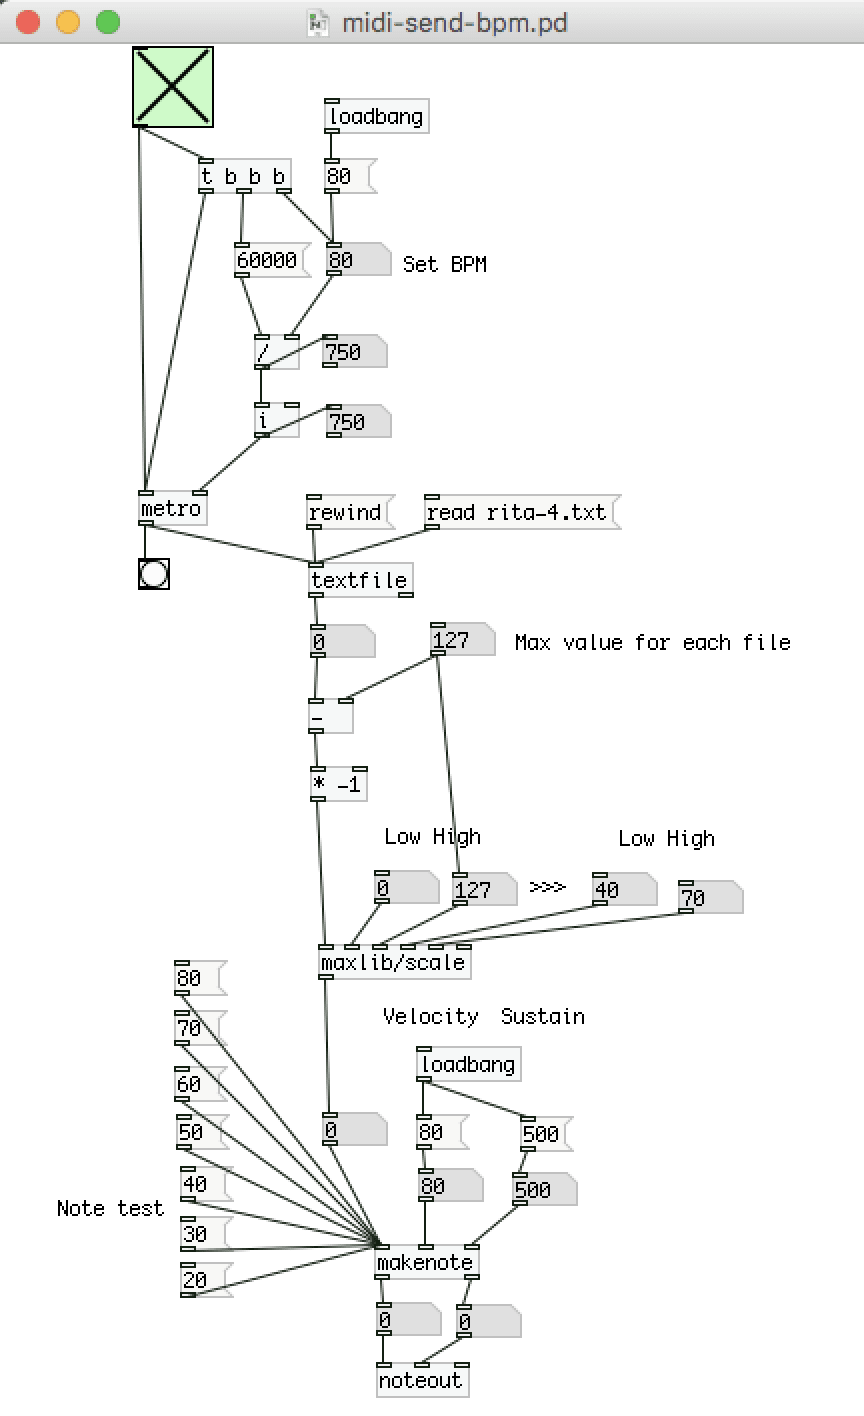
Set a BPM using the labeled number object, and set the "Max value for each file" to whatever the highest number is in your list of coordinates (it's fine if you're off by a little). The patch will preform some math to reverse the number range so that higher numbers result in higher MIDI notes. By default SVG's measure distance from the upper left, so a high number value would equate to the bottom of the screen, and we want those troughs to be low notes (at least I did). Set a low/high range for your coordinate list.
The "maxlib/scale" object will shift the range of MIDI notes to a new Low/High value. This allows you to customize the range of the MIDI notes coming out of PD. For example, you could limit the range to a low range (e.g. 30-50), or use the full range of notes from 0-127. The first two numbers will be the "input" for this object, and the second two will be the new range that is passed on to the "makenote" object. The other two number values going into "makenote" are the velocity and sustain. Customize them if you wish.
Click the big green square (toggle) to switch on the patch and begin sending notes. You may need to exist Edit mode and click on the "read" object to read the new text file, and then click the "rewind" object to make sure it starts at the beginning. You can press "rewind" anytime.
That's it! Your DAW (Ableton, Logic, etc. ) should be receiving MIDI notes generated from the text file. If it's not working, try restarting and relaunching both applications. Sometime the virtual MIDI bus needs a kick to get going.

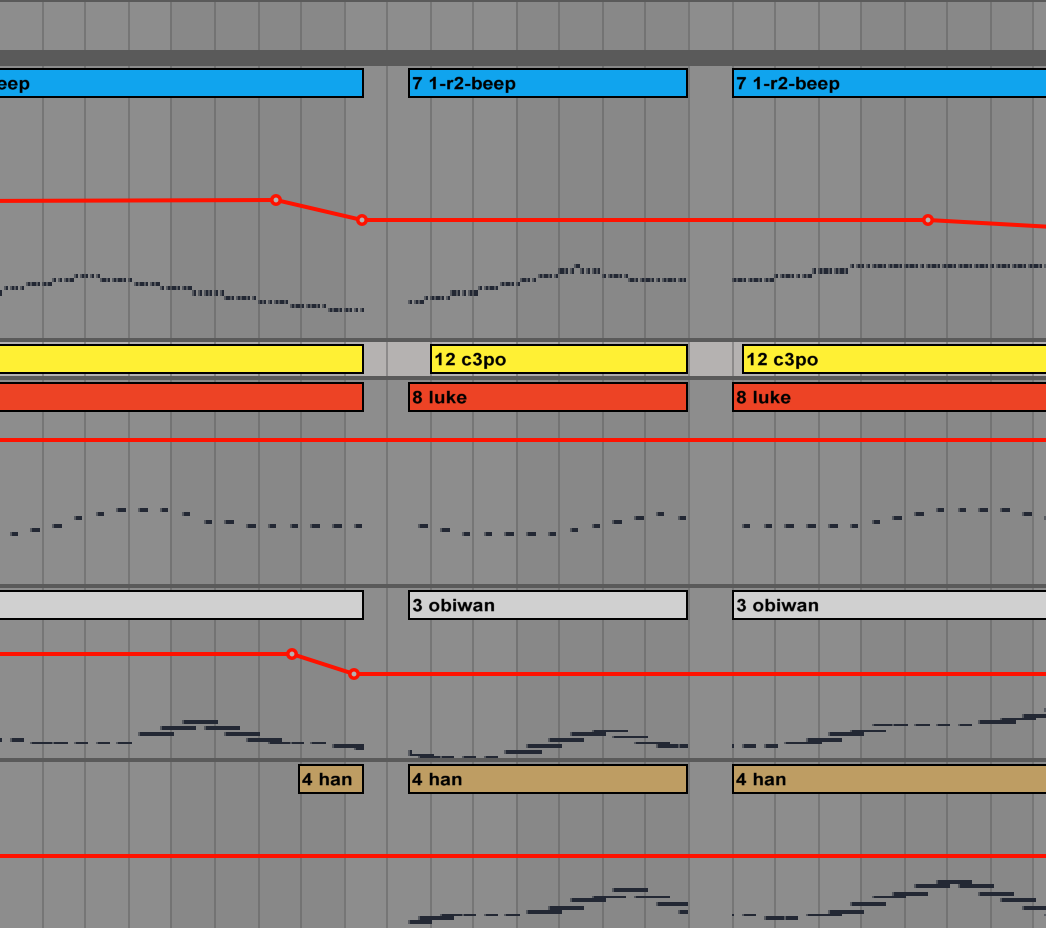
Step 4. Choose your instruments
Now that you've got a banging MIDI machine, choose some MIDI instruments or samples to be triggered by your data-generated notes. You can create synths and noises in PD, but it's a lot easier to do this composition part in a polished DAW.
Once you've chosen an instrument, hit record in your DAW — and then rewind the text file in PD to start from the beginning.
